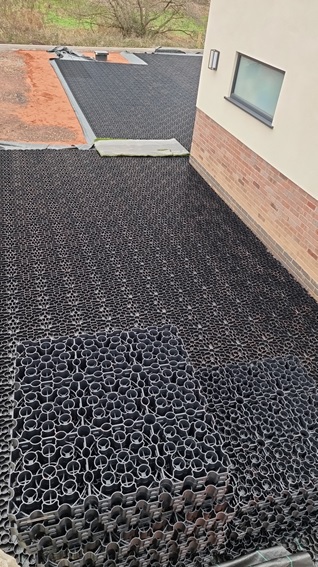
A gravel grid system is designed to prevent dispersal and migration of gravel.
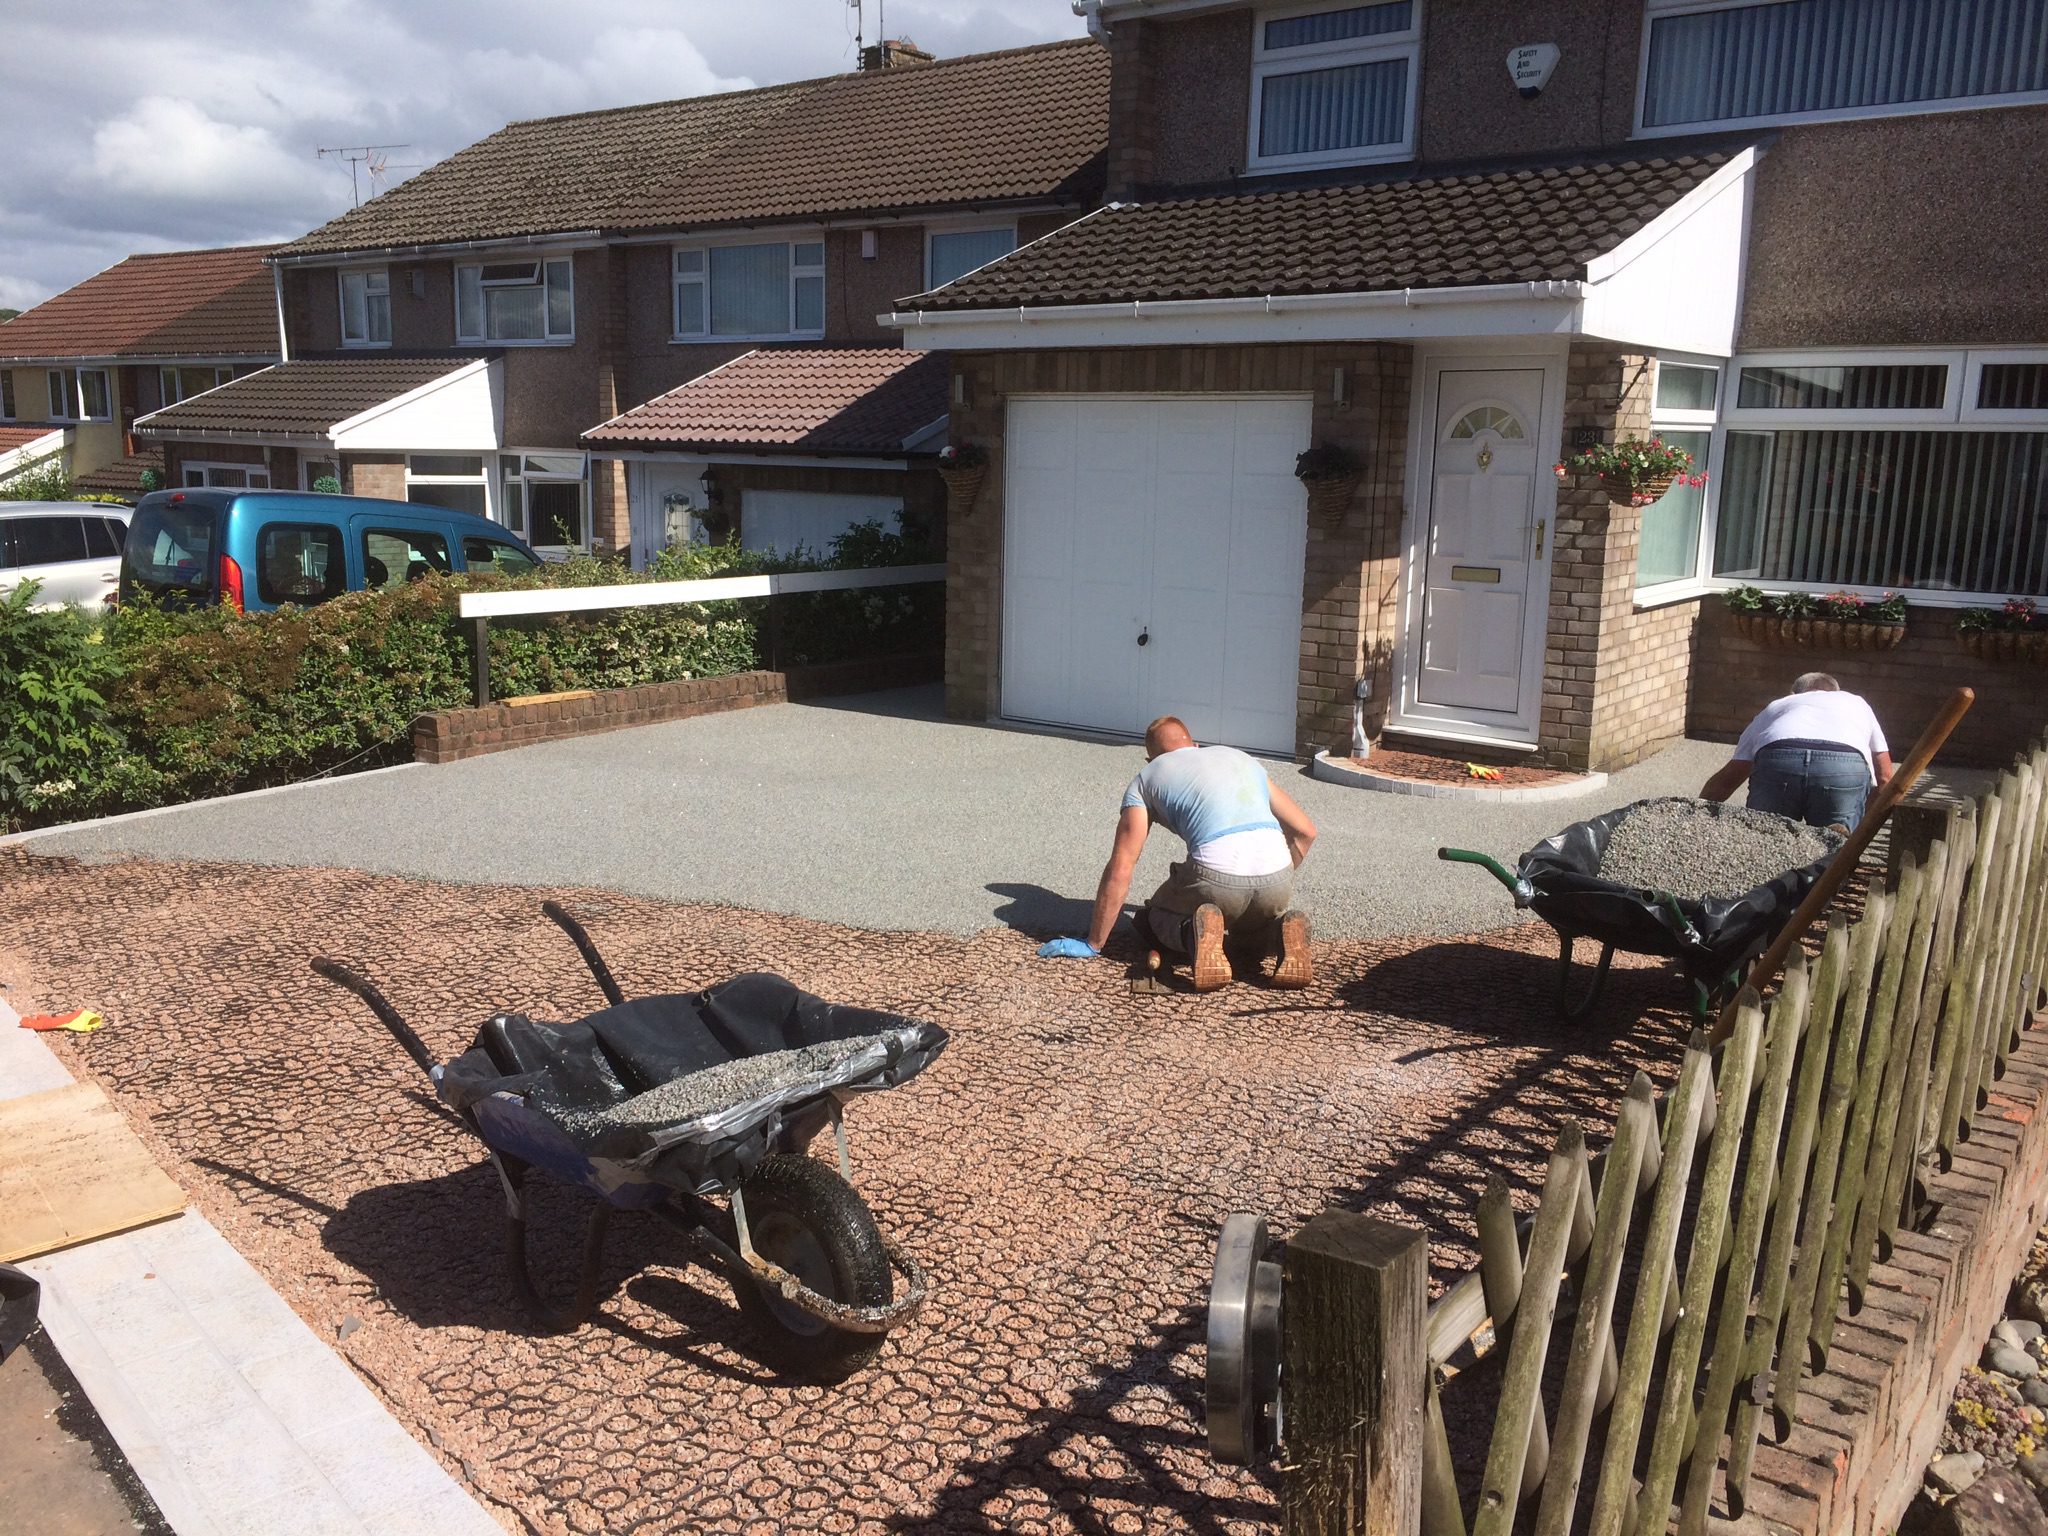
Gravel is a popular choice when it comes to the surface finish for driveways from both a cost and convenience perspective.
It may be inevitable that loose materials will spread over time, but gravel grid can help to eradicate this issue.
TakeawayGravel grids are increasingly popular in the UK. By using gravel grid you can ensure gravel stays in place and material migration is prevented.
Gravel grid holds the gravel in place, whilst being SUDS compliant and can last for many years.
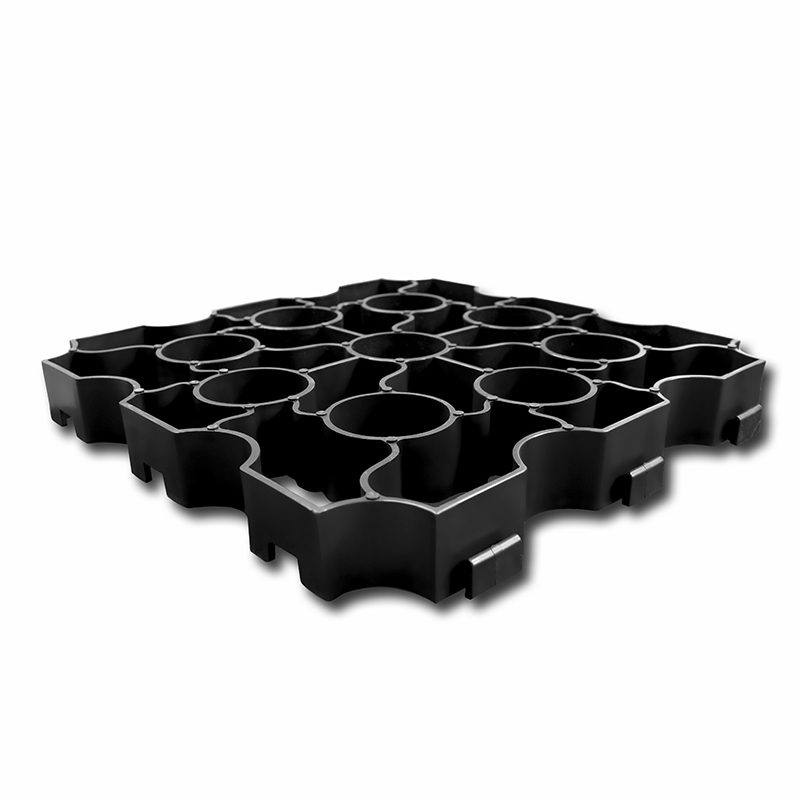
What is X-Grid Ground Reinforcement grid?
X-Grid is our very own ground reinforcement grid – it is eco-friendly and made from 100% recycled plastic.
It is suitable for use on driveways, paths, car parks and access roads – anywhere that will be walked or driven on.
X-Grid is the ultimate in ground retention, able to withstand the weight of 428 tonnes per m2 and is fully SUDS compliant so water will drain through.
X-Grid is available in three different colours.
Are gravel grids worth installing?
Gravel can add value to a property – it can elevate appearance and kerb appeal of a property.
More stability and less maintenance: Gravel grids are a relatively new method of installing gravel driveways. They provide greater stability, avoid rutting and unevenness over time and the circular cells hold the gravel in place. Further, a set up involving a geotextile membrane helps to eradicate weed growth.
Less gravel and easy installation: X-Grid is easy to install and the long-term benefits of the system vastly outweigh the costs.
The costs of not installing gravel grids: A gravel grid can eradicate the issues associated with installing a gridless driveway, which are fraught with problems. Gravel shifting and rutting, regular maintenance requirements, topping up gravel that has thinned out and increased labour costs during set up.
Gravel grids add stability to the ground and need less maintenance compared to if it was fitted without gravel grid.
How to install gravel grids
Gravel grid is easy to install and helps to prevent resin bound gravel migration. To fit the gravel retention system follow this guide.
Gravel grids are easy to install and fill with gravel.
Step 1: Creating a base for the gravel and gravel grid
The gravel grid can only be installed if you have a smooth and solid base for it to be put onto.
Excavate out to a minimum depth of 100mm – 150mm is recommended.
If the driveway is being edged using block paving (or similar) you need to make sure all is laid and dried before the MOT and gravel is installed
It is recommended that an MOT type 1 is compacted or similar to a depth of at least 100mm.
The sub-base provides the load bearing ability of the driveway by helping to spread the weight of traffic from above whilst also creating a solid layer that is resistant to rutting and channelisation.
A small excavation should be undertaken before X-Grid is installed, to ensure the surface is smooth.
TakeawaysExcavation takes place so that the area is smooth then a sub-base is added to provide longer term benefits.
The difference between MOT Type 1 or MOT Type 3
MOT Type 1 and MOT Type 3 can be used to create the sub-base.
MOT Type 1 is a crushed carboniferous limestone which is ideal for creating a hardcore base when laying patios, driveways and artificial grass.
It is a versatile solution that also makes the requirements of the department of transport specification for highway works.
It can be made from granite, limestone or clean crushed concrete. The product is crushed to 40mm down to dust creating an aggregate containing a range of particle sizes that is easy to compact with excellent load bearing qualities.
Type 3 is the unbound sub-base material typically specified when a free-draining sub-base is required. It is commonly used with permeable pavers.
It is an open-graded crushed aggregate roughly in the range 40mm to dust.
This is most common for horse menages, sports fields, games pitches, tennis courts and anywhere that a free-draining but load-bearing sub-layer is required.
MOT Type 1 and MOT 3 can be used as a sub-base below the gravel grid and woven membrane.
TakeawaysMOT Type 1 and MOT Type 3 are very similar sub-bases but have very notable differences. Type 1 is the most common base, but Type 3 is more permeable.
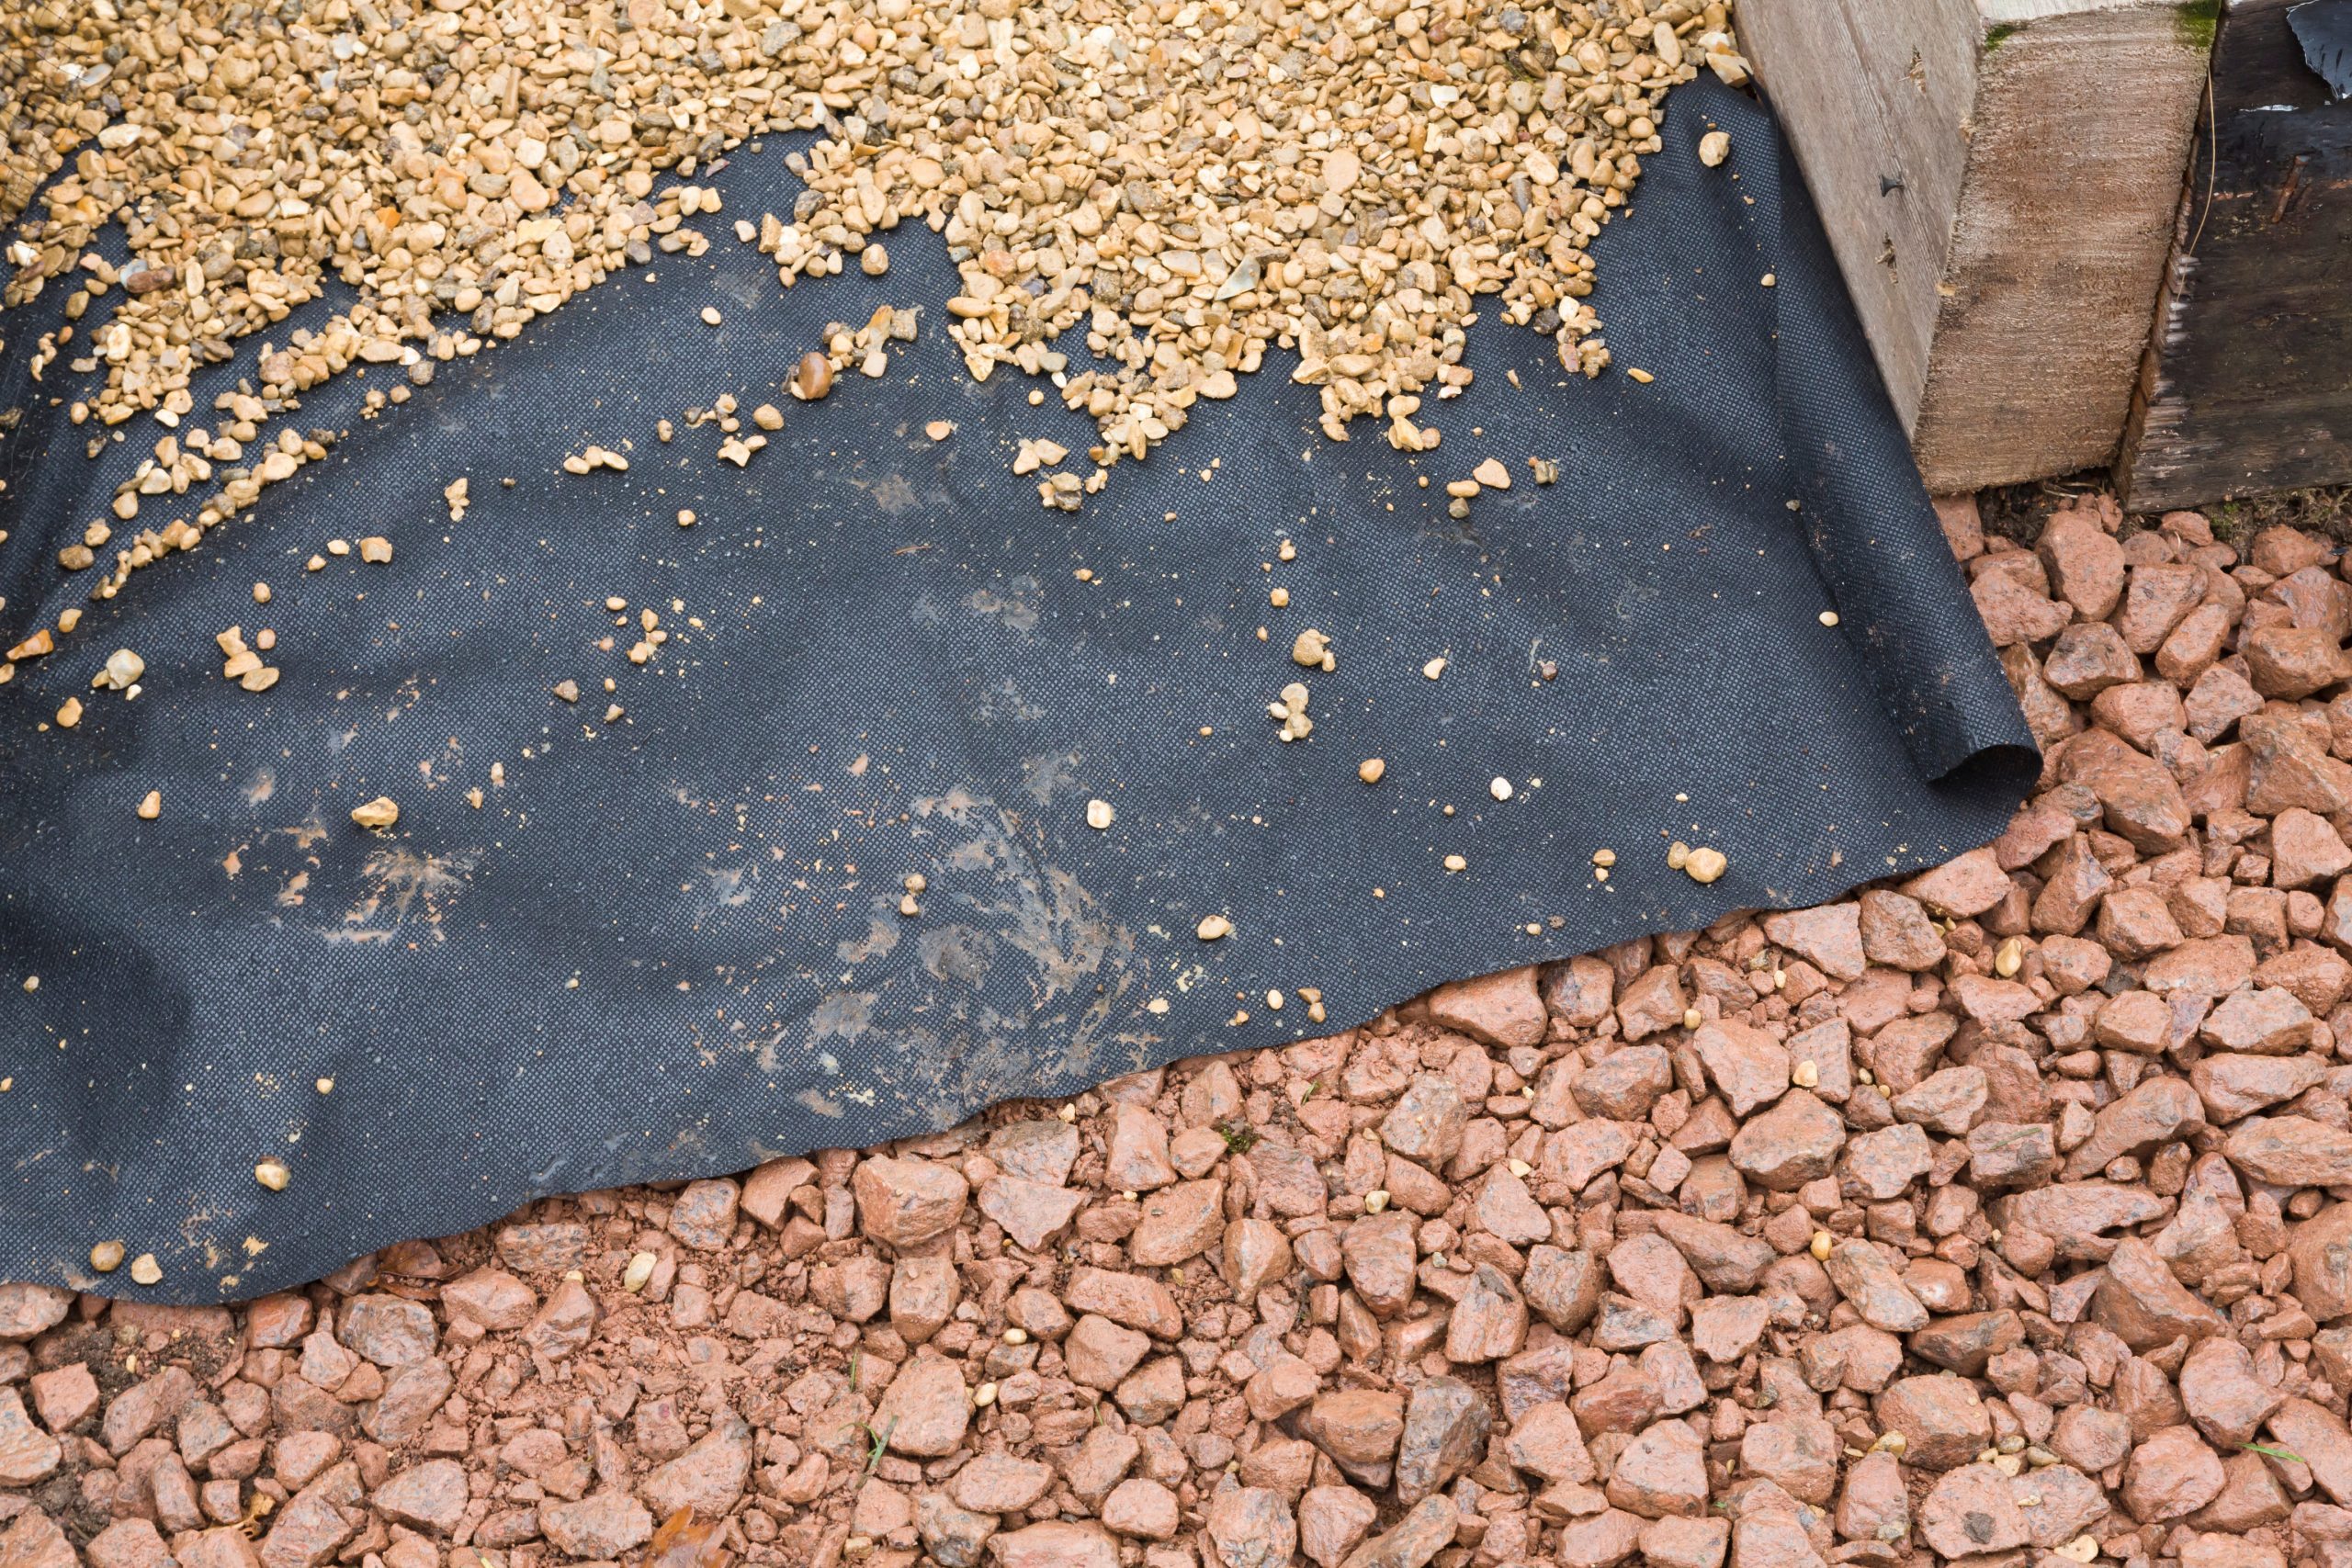
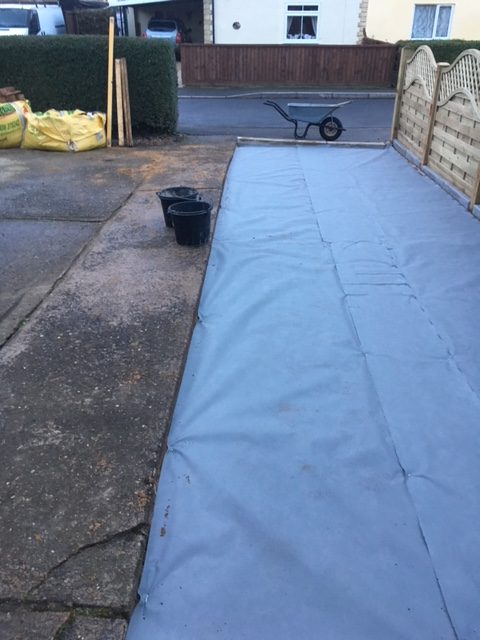
Step 2: Laying the weed membrane
The weed membrane is laid directly under the gravel, on top of the sub-base.
It can be installed by simply rolling out the membrane, ensuring it covers the entirety of the sub-base or soil, and then pegged into position.
It is recommended for gravel driveways that a heavy duty weed membrane – such as a polypropylene one – is used. This is harder wearing and more suitable for use on a drive.
TakeawaysThe Geotextile Membrane means that rainwater can still reach the ground below and prevent flooding, whilst also ensuring that weeds cannot rise to the surface.
A weed membrane ensures weeds cannot penetrate the gravel surface.
Types of Weed Membrane
Geotextile Membranes are used on landscaping projects to create a long-lasting barrier between the ground and a chosen product or covering above.
The membranes help to suppress weeds whilst remaining permeable to help rain water drain away and reduce the chances of surface water build-up.
Woven membranes are the heaviest sheets in our range, ideal for controlling the growth of annual and perennial weeds. Manufactured from woven membrane the sheets are strong, tear-resistant and long-lasting.
The non-woven membranes are robust and permeable. These membranes are particularly popular on projects which require drainage, separation and filtration.
A weed membrane ensures weeds cannot penetrate the gravel surface.
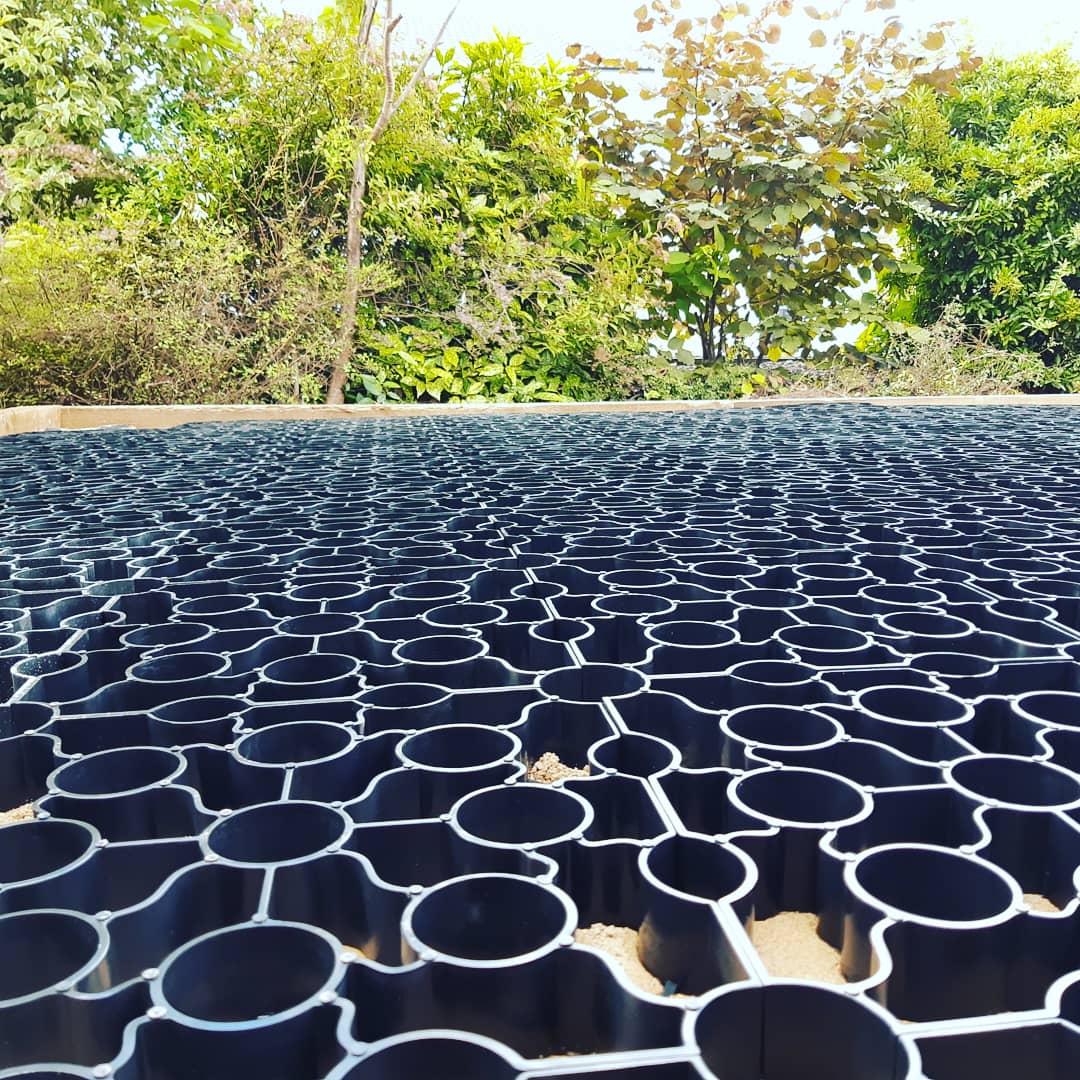
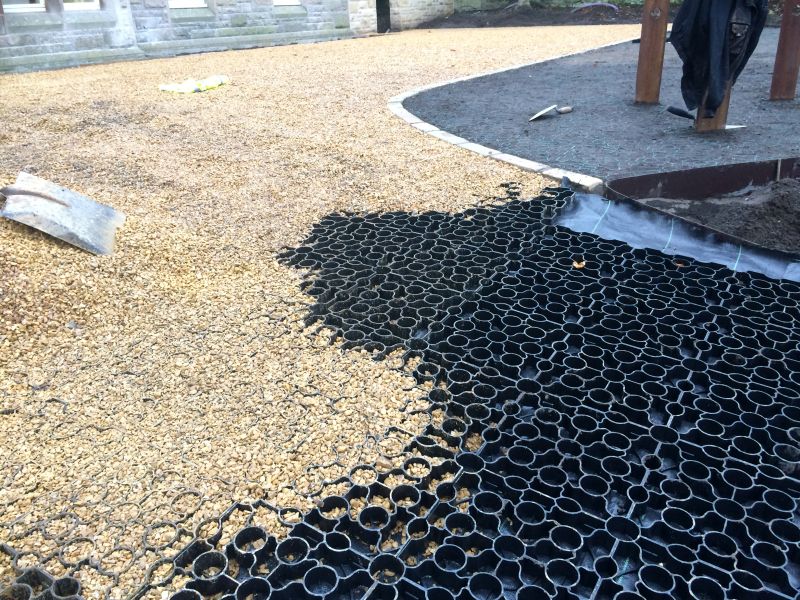
Step 3: Laying the gravel mats
The gravel mats can be installed with ease – as the mats can be simply interlocked together.
The gravel grids provide a stable base for gravel whilst reducing the risk of slipping.
They are simple and easy to use.
X-Grid are easy to install as they easily interlock together.
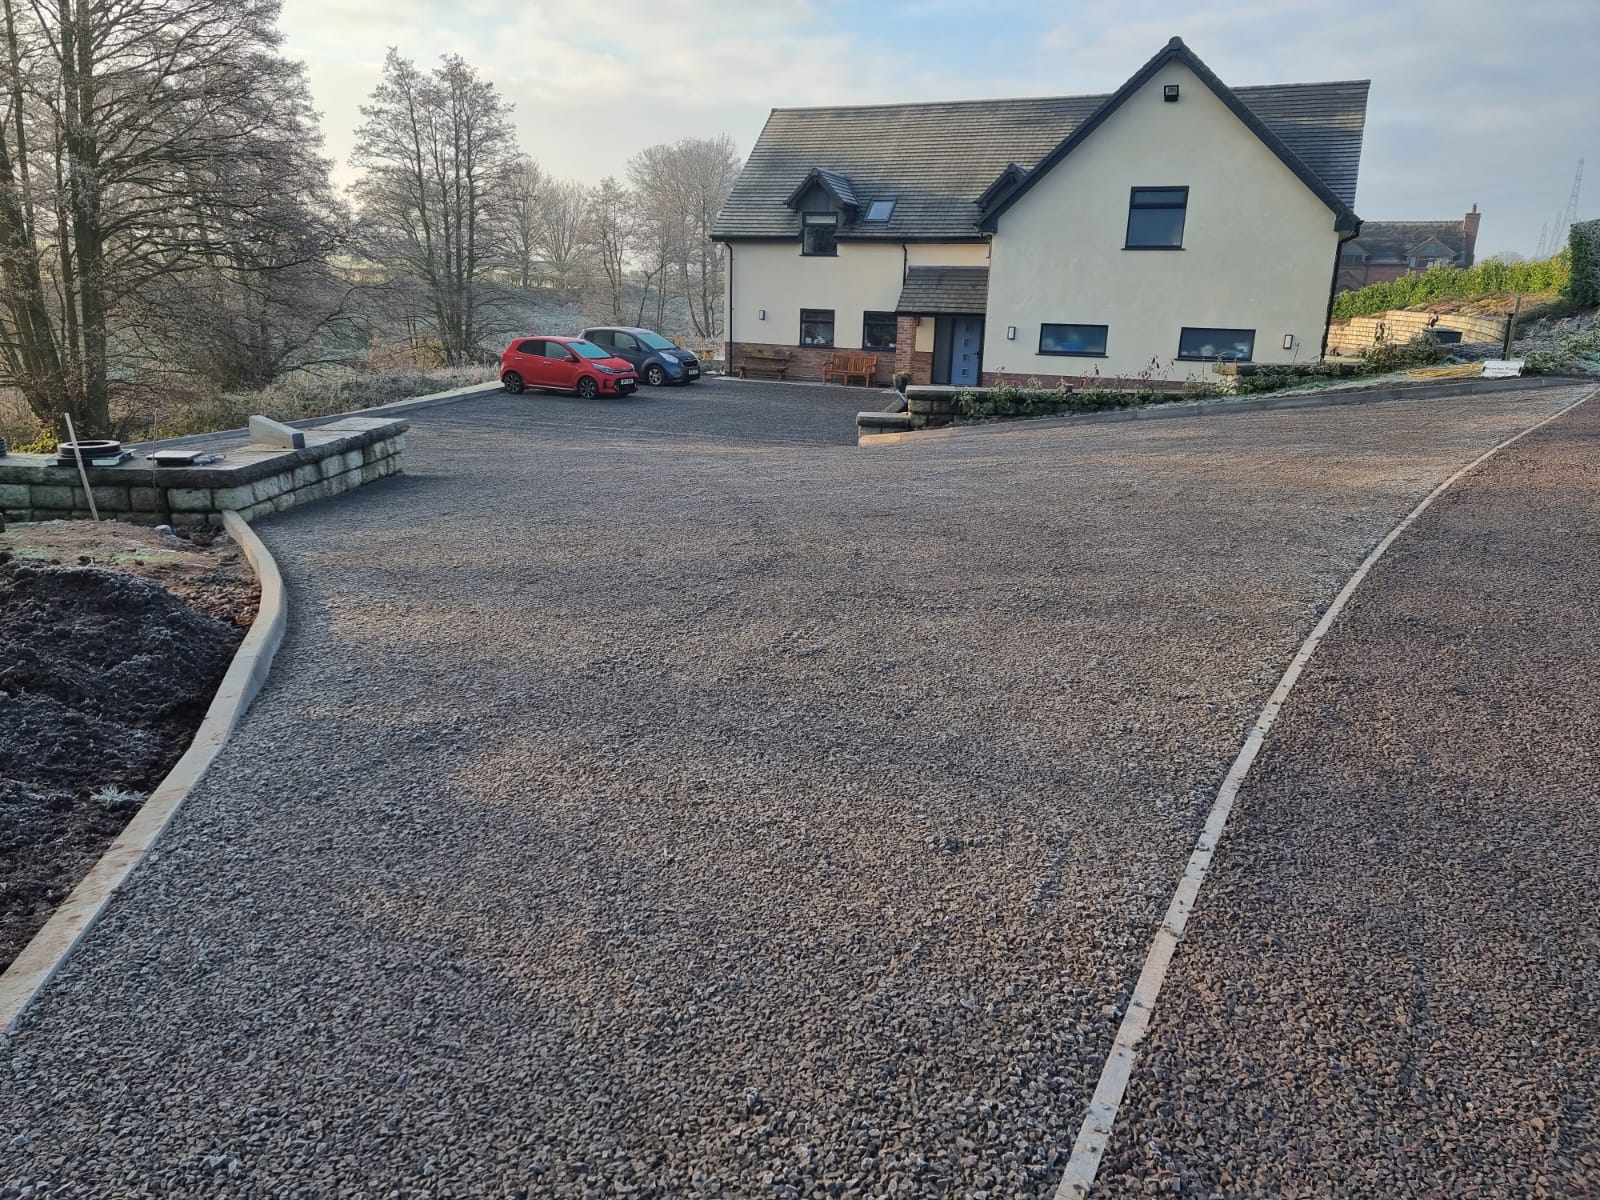
Step 4: Laying the gravel
The gravel completes the finished surface of the gravel driveway.
Gravel provides a decorative finish – though many DIYers make the mistake of laying the gravel too deep. It is recommended that a maximum depth of 50mm be applied – as this provides great coverage to the sub-base whilst also being shallow enough to prevent rutting.
The size of the gravel should be around 20mm in size. If smaller sizes are used they can get stuck in car tyres. Any larger and they can be difficult to walk on.
Spread the gravel over the entire area ensuring an even coverage. Then use a rake or spade to help level out the stone.
Once the base, membrane and grid are complete the gravel can be led. Many colours are available to match with surroundings.
TakeawaysGravel is available in a range of colours and can be spread with ease, fitting into the X-Grid to prevent migration.
Conclusion
Together with improved long-term stability and low maintenance benefits, the advantages of laying a gravel grid system far outweigh any upfront additional costs.
A correctly installed resin bound gravel driveway with gravel grid will ensure that the grid cannot migrate as the grid holds it into place whilst a weed membrane, stops weeds from encountering the gravel.
To find out more information call our team on 01246 418144.
Alternatively, contact us on webchat or email us here.