Ensuring you are laying your resin bound gravel on top of a well-prepared surface is one of the most important parts of the entire project. If you choose to install on loose, uneven, or damp surfaces there is a danger that your resin bound surface will eventually start to crack and break up, begin to display dark patches/spots or even foam if moisture is present.
By choosing to correctly lay your resin bound surface onto a suitably prepared area featuring X-Grid gravel grids on a warm and dry day, the previously mentioned dangers should not occur to your installation.
Potential Resin Bound Grid Issues
Some resin bound installers have formed the opinion that gravel grids won’t work for them or have experienced other grid installations failing them in the past. In the next image you will see two comments from resin bound installers in the TalkResin forum.
However, these assumptions and experiences have been formed when using inferior grid systems. By choosing to use a plastic grid system with flappy connections and unstable cell walls you leave yourself open to the potential movement and possible cracking of your resin bound surface.
But wait! Do not write off and tar all resin bound grid systems with the same brush! By using a strong & durable market-leading ground reinforcement grid such as X-Grid, you can simply negate these potentially damaging issues.
X-Grid Resin Bound Gravel Surfaces
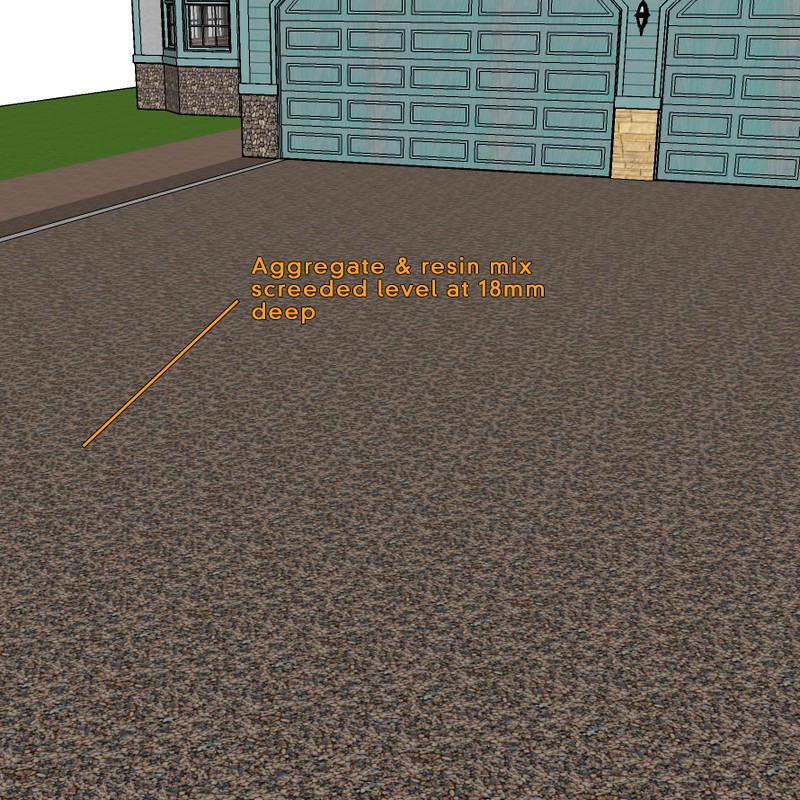
X-Grid is the perfect solution when it comes to creating a solid sub-base onto which you can easily lay your resin bound surface. Once filled with angular gravel, you can begin to trowel your mixed resin bound material just as you would over any other surface.
Rest assured our grid will more than solve all of your potential past issues thanks to our unique integral slot and peg connection system and ultra-strong load-bearing capacity which prevents movement and the possibility of surface cracking.
As well as preventing any potential issues, X-Grid also carries a whole host of benefits to make using our grid even more worthwhile:
Our grid will help to keep your costs down and speed up the installation process by removing the need to pay out for tarmac or concrete before having to wait for the area to fully cure. One person is able to lay upto 100m² of X-Grid in just one hour and once installed, can have resin bound trowelled over immediately!
Being fully permeable and SuDs compliant, as are resin bound surfaces, there will be no issues with planning permission and will meet almost any project requirements as rain or potential surface water can simply drain away naturally into the ground below.
Continue reading to see how X-Grid can be incorporated into your future resin bound gravel projects.
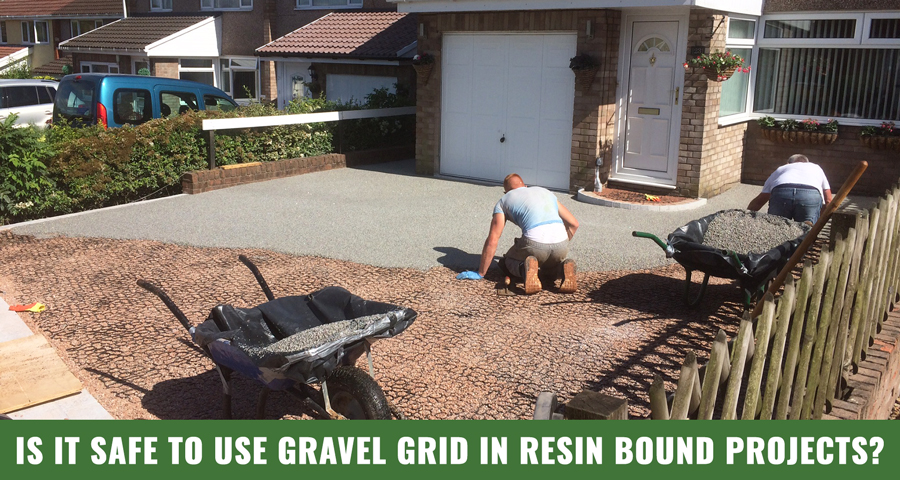
Resin Bound Gravel Installation Using X-Grid
As with most new processes, it can be difficult to know where to start so below you will find an in-depth resin bound installation process that includes the use of X-Grid in the sub-base build-up:
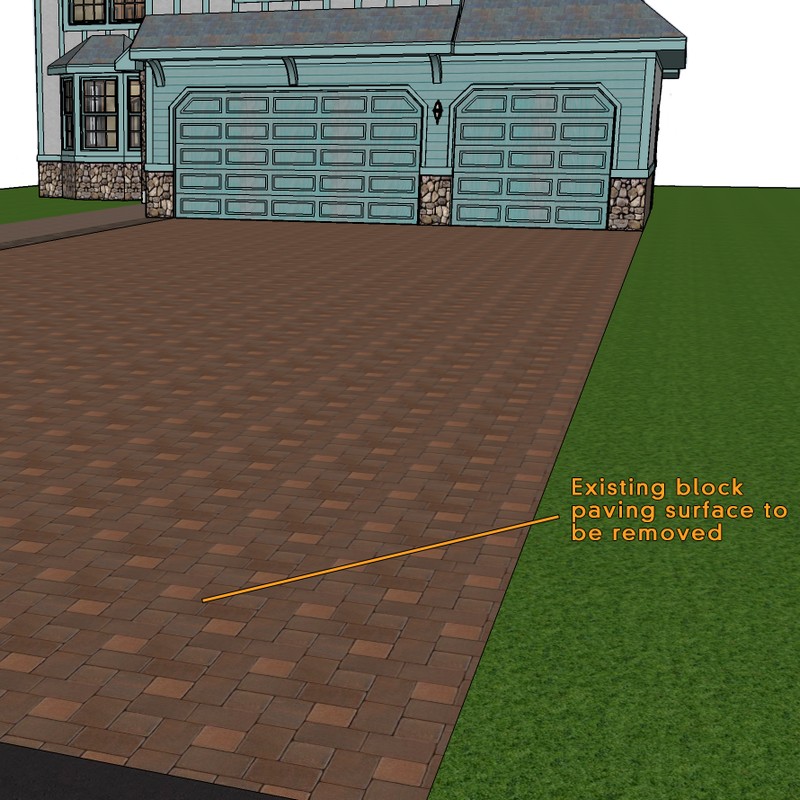
Remove Existing Surface
The first step is to remove and responsibly dispose of any existing surface that may be in your installation space including block-paving, tarmac or concrete. If there is no existing surface, move on to the next step.
If removing block-paving, you may wish to save the bricks and reuse them later on as an attractive edging system around your resin bound area.
Excavate The Area
Now there is no hardscaped surface the area should be excavated down to a minimum depth of 220mm but this may need to be more depending on the type of installation you are going to be carrying out.
The type of traffic and firmness of the ground below should be taken into account, for installation advice please do not hesitate to contact us.
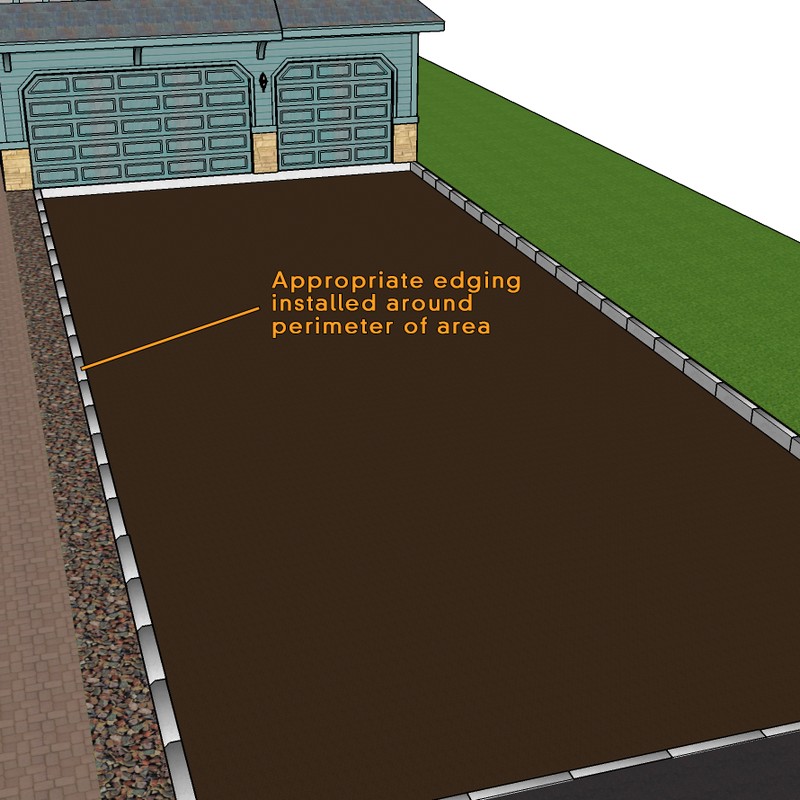
Install A Perimeter Edging
Around the edges of your installation, a suitable and weight-bearing edging should be installed. An edging such as metal edge strips, block-paving bricks or kerbstones that will not rot or break down over time is recommended.
The edges should always be installed according to the relevant manufacturer instructions. You can browse our resin bound edging profiles.
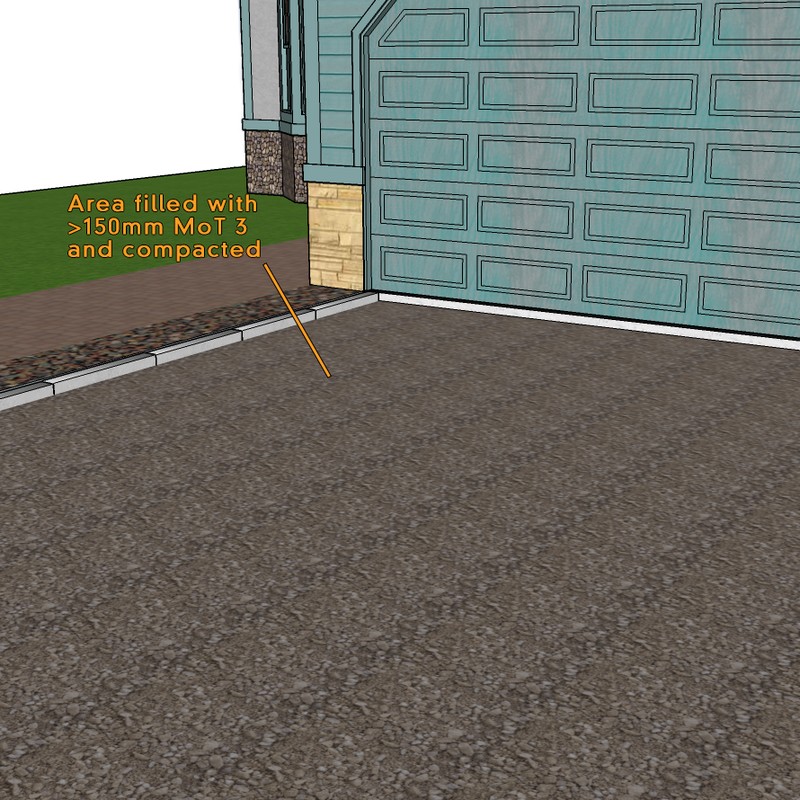
Fill Area With MoT 3 and compact
With the perimeter edging now in place, a base layer of MoT type 3 should be laid at a minimum depth of 150mm. This is the minimum however and intended use and ground stability should be taken into account when deciding the depth.
The MoT layer should then be compacted using a roller or vibro-plate (whacker) to ensure the base is consolidated.
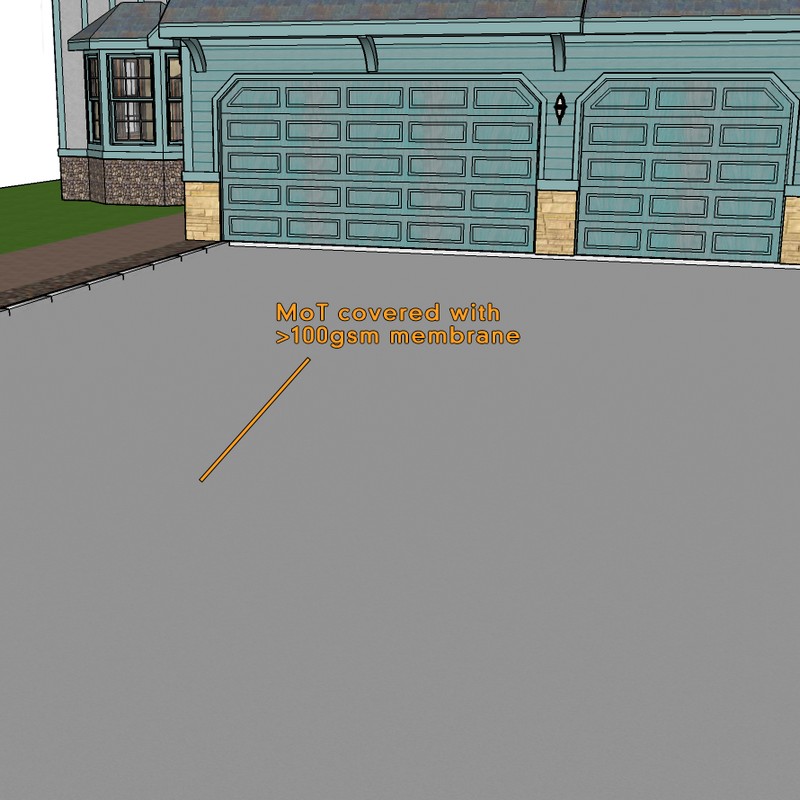
Lay membrane Over Hardcore
With the hardcore layer laid and compacted, an appropriate permeable geotextile membrane should then be laid over the top. It is recommended that the membrane is no less than 110 grams per m² to ensure optimal suppression of weeds.
Any membrane joints should have a 100mm overlap and need fixing in place with u-pins to prevent movement and sand wash-out.
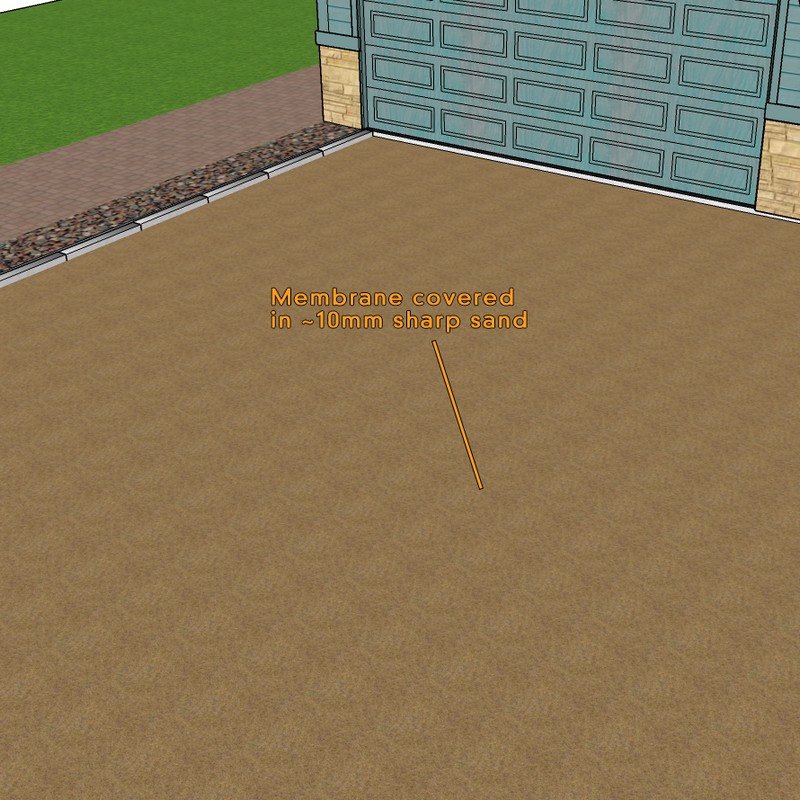
Add Sand bedding layer over membrane
At an approximate depth of 10mm, a bedding layer of sharp sand should now be laid onto your fixed geotextile membrane. Please note, this is not a fixed depth as the sand layer is intended to smooth out any undulation present in the hardcore layer.
This bedding layer can also be lightly compacted with a whacker plate but should be completely level and checked with a spirit measure.
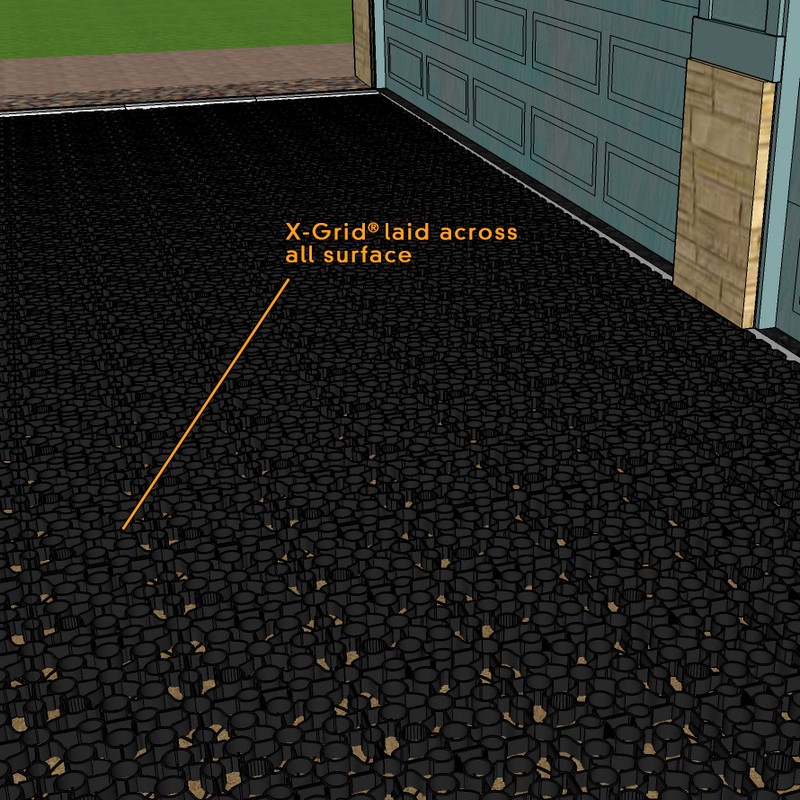
Install X-Grid
With a flat and compact sanding layer now in place, you can begin the installation of your X-Grid ground reinforcement grid layer.
Starting in one corner, lay one panel at a time and simply connect neighbouring X-Grid panels together using the strong integrated slot and peg connection. Repeat this process of laying and connecting until the area is covered.
X-Grid is simple to install with one person being able to lay up to 100m² in just one hour!
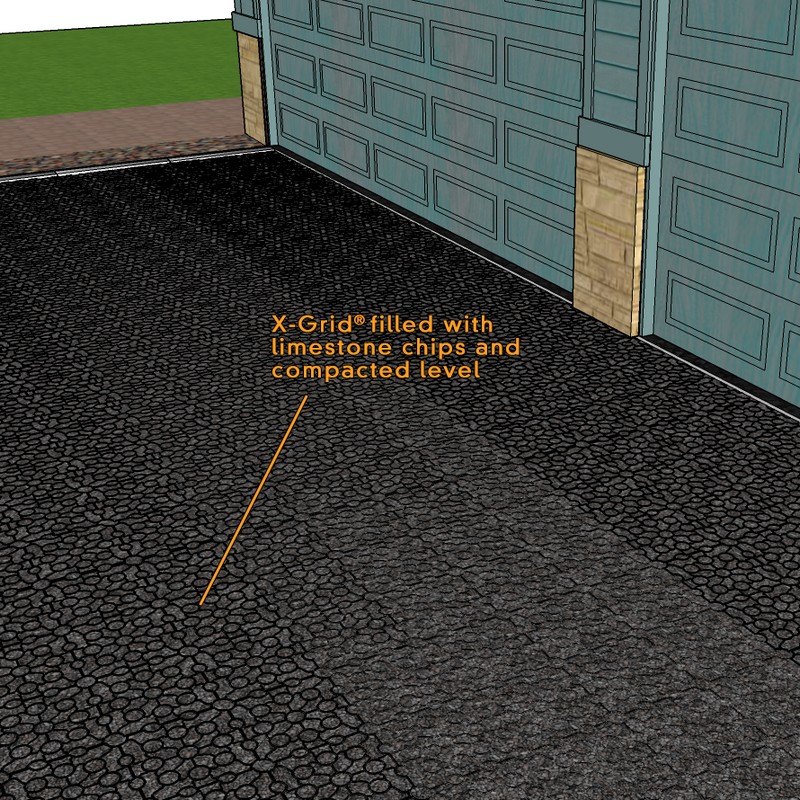
Fill With Angular Gravel & Compact
X-Grid should now be filled the grid should be filled with angular aggregate with a diameter of no larger than 20mm. Care should be taken to ensure that as much excess dust is removed from the stone as possible and there is no moisture present. We estimate that 72kg of aggregate is required to fill 1m² of X-Grid.
Once filled, the grid and aggregate should be lightly compacted with a whacker plate to ensure it is sufficiently bedded into the sharp sand and the fill is as level as possible.
If you are not familiar with how you should mix and lay resin bound gravel, read our full resin bound installation guide.
Conclusion
Yes, it is safe to lay your resin bound surfaces onto a gravel grid! However, you need to ensure that you choose an ultra-strong, stable, SuDs compliant and proven grid in X-Grid! By choosing a tried and tested gravel grid you will avoid the potential pitfalls previously mentioned in this article and instead create beautiful surfaces where you have peace of mind knowing X-Grid won’t let you down.
GCL Products is your one-stop shop for everything you could need for a resin bound gravel project. Browse our resin bound range here and get in touch to let us quote your next project.
You can call us on 01246 418144 or LiveChat with us during office hours. Outside of these times please leave us a message and we will contact you upon our return.